Friday, April 30, 2010
Wednesday, April 28, 2010
Hello Kitty Is All Grown Up
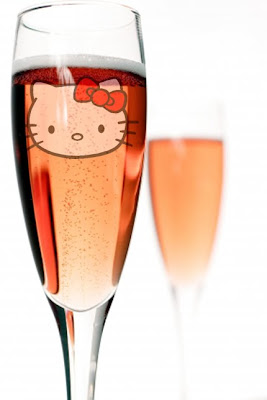
I've always loved Hello Kitty, so how fantastic that Hello Kitty has it's own wines! Check out the Pink Kitty cocktail, yum!
Here are some tasting notes for the four types:
Hello Kitty Sparkling Brut Rosé - A deep reddish pink sparkling rose made from 100% Pinot Noir that has a frothy mousse as well as a pretty nose of rose petal and red currant scents.
Hello Kitty Sparkling "Sweet Pink" (Half Size) - This semi-sweet sparkler sports a pale pink hue and has very delicate bubbles.
2008 Hello Kitty Angel White - This is a fresh, very "blanc" white wine made entirely from Pinot Noir free run juice.
2006 Hello Kitty Devil Red - Garnet red with brickish highlights, this is a classically rendered Pinot Noir that presents a seductive bouquet of wild flowers and forest aromas.
Complete tasting and technical notes for each wine type at HelloKittyWine.com.
Thursday, April 22, 2010
Happy 40th Birthday Earth Day!

This year Earth Day will celebrate its 40th birthday. Earth Day began as a call to action for environmental causes after a series of environmental problems came to light. These included the effects of the industrial age, the 1969 oil spill on California’s coast, and the connection of several environmental toxins to birth defects. It began as a national holiday in 1970, the same year the Environmental Protection Agency (EPA) came into existence.
We would love to say that Earth Day has put an end to all environmental problems and that our lifestyle is completely sustainable but, unfortunately, some of the worst environmental problems have happened in the past 40 years. This doesn’t mean it’s time to give up: far from it. We’ve made leaps and bounds in technology that helps us become less dependent on fossil fuels. We’ve raised awareness for the Earth and the problems that need solutions. We’re making a difference, but it’s time to step it up a notch. Use this Earth Day to enroll in green energy credits with your utility provider, or commit to never using a disposable container in your home, or bike to work for half the week, or write to your local politicians. Whatever you choose, commit to it. Make a resolution for the Earth.
Tuesday, April 20, 2010
Vintage Silverware Place cards
 These tarnish silver-plate vintage silverware are perfect for place setting accents, and garden markers! A vintage or rustic wedding must have.
Where to find: whitetulipboutique's shop
Friday, April 16, 2010
Fashion Fridays: Coachella Festival
Images Via: LA Guest of a Guest, Things we Heart, Elle
Friday, April 9, 2010
Thursday, April 1, 2010
DIY... Easter Egg

Preparing the Shells
You can empty the contents of a raw egg without damaging the shell. (If you prefer, use wooden eggs, available at crafts stores.) Carefully twist the point of a utility knife against each end of the egg to create two small holes. Insert a long pin through a hole to pierce the yolk. Blow out the insides with an egg blower, available at crafts stores, or with a rubber ear-and-nose syringe. Let drain; rinse. Blow out again, rinse again, and let dry.
Tools and Materials
Blown-out eggs
Pencil
Origami paper
Embroidery scissors
Small paintbrush
Glue sealant, such as Mod Podge
Elegant Eggs How-To
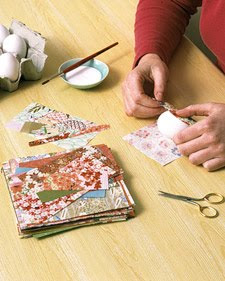
1. Mark egg's length plus 1/4 inch on paper; roll paper around egg's circumference, add 1/8 inch, and mark. Cut out resulting rectangle.

2. Fold rectangle in half lengthwise. Cut 1/4-inch-wide strips on both sides of fold, stopping 1/4 inch from fold.

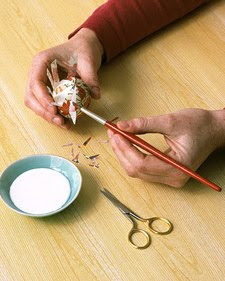
3. Brush glue sealant down fold on unprinted side; wrap around center of egg. Cut one strip to a point so it just reaches egg's tip.

4. Brush strip with glue; press gently. Repeat on every other strip, then with remaining strips (trim to fit smaller spaces). Repeat with other end of egg.

5. Brush glue over half of egg to seal. Let dry; repeat on other half.


